Capturing dynamic, moving photos isn’t exclusive to iPhone users anymore. While iPhones have Live Photos, Android users can enjoy a similar effect with third-party apps available on the Google Play Store, like Motionleap. With Motionleap, you can add life to your photos, making elements like clouds, water, or other aspects move, giving your static photos a captivating edge.
Table of Contents
What Is a Live Photo?
Live Photos are a unique feature initially introduced by Apple, allowing users to capture moments with a slight animation. Rather than a still image, Live Photos record a few seconds before and after pressing the shutter button, creating a mini video of sorts. Android users can now emulate this effect using apps like Motionleap.
How to Create a Live Photo Effect on Android: A Step-by-Step Guide
Step 1: Download and Install Motionleap
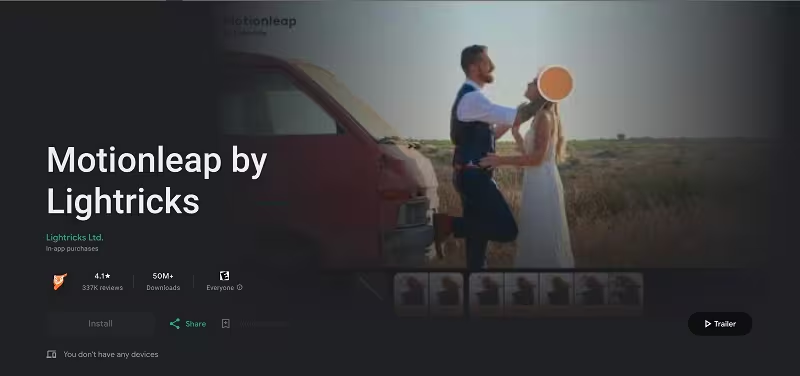
Motionleap by Lightricks is available on the Google Play Store, and it’s designed for Android users who want to create live photo effects.
- Search for Motionleap: Open the Google Play Store, search for “Motionleap,” and install it. If you want the free motionleap APK then visit our homepage. The app offers both free and premium options, so you can experiment before deciding to invest in the Pro version.
- Permissions: Motionleap may ask for access to your gallery and camera. Allow these permissions to access and edit your photos.

Step 2: Upload Your Photo and Begin Editing
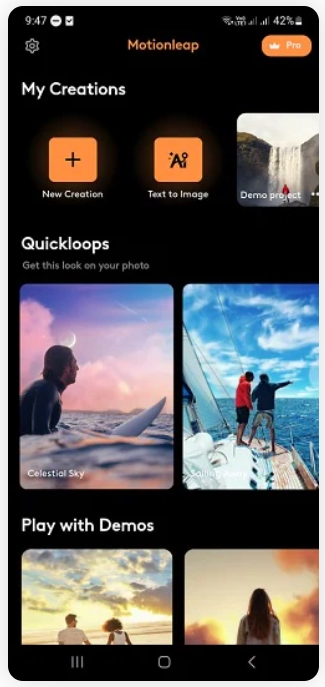
Once installed, open Motionleap and tap New Creation to start your project.
- Choose Your Photo: Select the photo from your gallery that you’d like to animate. Motionleap works well with a variety of scenes, but images with elements like clouds, water, or smoke can look especially impressive with the app’s effects.

Adding Animations to Your Photo
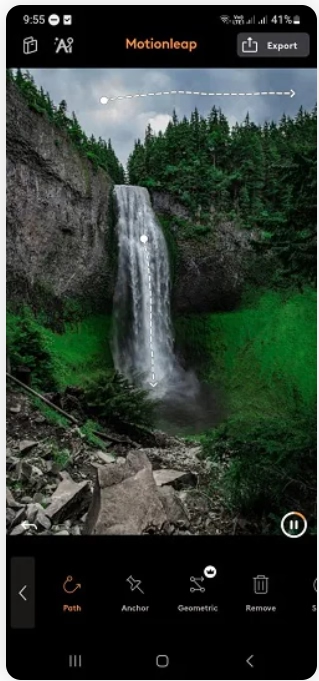
After uploading your photo, it’s time to add animations. Motionleap has multiple animation tools that allow you to create custom movement paths and control the flow of elements.
Using the Path Tool for Smooth Animations
The Path Tool in Motionleap is designed to create directional movement across parts of your image. This tool is ideal for making elements like rivers, clouds, or flowing fabric appear to move in a specific direction.
- Set Anchor Points: Use anchor points to keep certain parts of the image still while other parts move. Tap the screen to set paths and define how you’d like certain areas to animate.
- Add Directional Arrows: Draw arrows along the areas you’d like to animate. For instance, you could draw arrows in the sky to simulate moving clouds.
Using Anchor Points to Fix Parts of the Image
Anchor points ensure that only specific elements move, keeping the rest of the image still.
- Placing Anchor Points: Tap to add anchor points around the areas you want to remain static. This gives you more control over the animation and creates a more natural-looking effect.
Using Overlays and Effects
Motionleap also includes a range of overlays and effects that can bring your live photo effect to life, such as rain, snow, or fire.
- Choosing Overlays: Open the Overlays menu and select from options like Sparkles, Snow, or Clouds. This adds additional layers to your animation, making the scene more dynamic.
- Adjusting Opacity and Speed: Control how intense each overlay appears by adjusting the opacity and speed settings, allowing you to blend effects for a more seamless look.
Step 3: Exporting and Customizing Your Animated Photo
Once you’re satisfied with your animated photo, you can prepare it for export. Motionleap provides various options to ensure your creation is optimized for different platforms.

Adjusting Export Settings
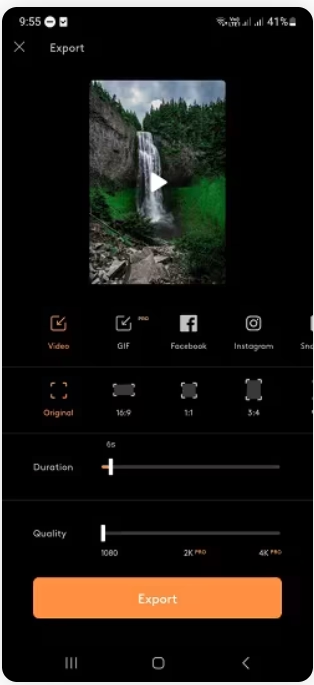
Before exporting, you’ll want to adjust the settings to get the highest quality possible.
- Choose Video Ratio: Depending on where you plan to share your animated photo, select the appropriate ratio. Popular ratios include 1:1 for Instagram or 16:9 for landscape orientations.
- Set Duration: Decide how long the animation should loop. Typically, a 3-5 second loop works well for social media.
- Choose Export Quality: For the best results, select the highest quality available. This ensures your animation looks sharp and professional on any platform.
Saving and Sharing Your Creation
Once you’ve chosen your settings, it’s time to export.
- Tap Export: Tap the Export button and choose a file format. You can save the animation as an MP4 video or a GIF, which is ideal for social media sharing.
- Share on Social Media: After exporting, you can share your animated photo directly on platforms like Instagram, Facebook, or Twitter, or save it to your gallery for future use.
Tips for Creating Eye-Catching Live Photos on Android
Creating live photos takes practice, but here are some tips to help you get the best results with Motionleap:
Use High-Resolution Images
Starting with a high-quality photo ensures that the final product will look professional and clear. Lower-resolution images can appear pixelated after adding animations, so try to use the best quality images possible.
Experiment with Different Effects
Motionleap has a variety of effects, from overlays to camera motion effects. Take time to experiment with each one to discover what works best for your photo.
Make Use of Tutorials
If you’re new to Motionleap, there are many tutorials available both within the app and on YouTube that can guide you through specific effects and techniques.
Final Thoughts: Why Motionleap is a Great Tool for Android Users
Motionleap offers Android users the ability to create live photo effects without needing an iPhone. The app is beginner-friendly but has advanced tools for users looking to push their creative boundaries. Whether you’re a casual photographer or someone looking to elevate your social media presence, Motionleap is an excellent addition to your photo editing toolkit.

